The following will guide you to ensuring you have enabled your Shipping setting in QuickBooks Online (QBO). You should do this prior to connecting your QuickBooks Company to weintegrate, however if you did not, you can disconnect your QBO Company, update the setting, and reconnect your QBO Company (click Manage Your QuickBooks Online Connection to learn more).
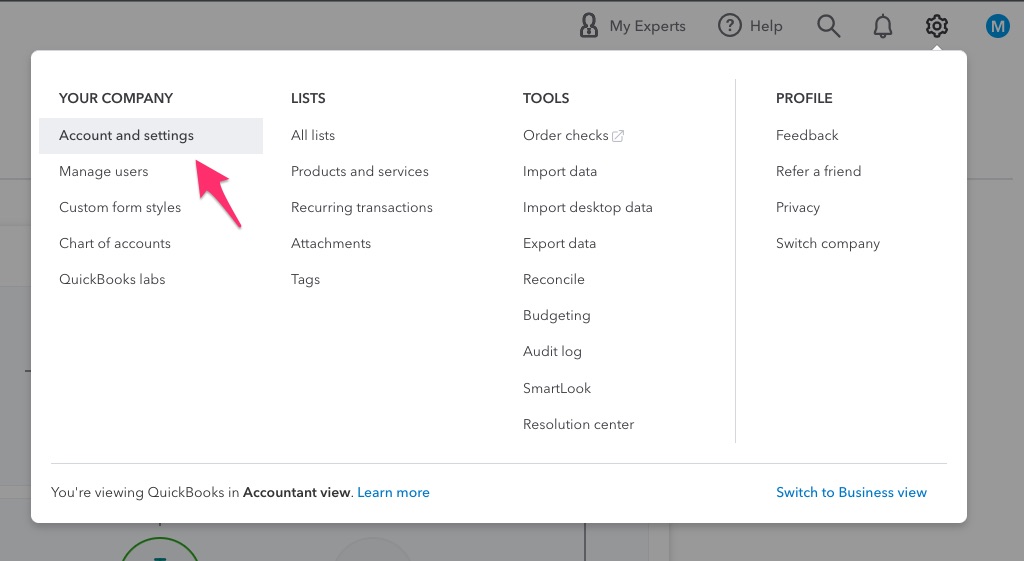
Turning on Shipping in QuickBooks Online is easy! Start by logging into your QuickBooks Company and clicking on the gear icon at the top right of the screen.

Then select the Account and Settings menu option.
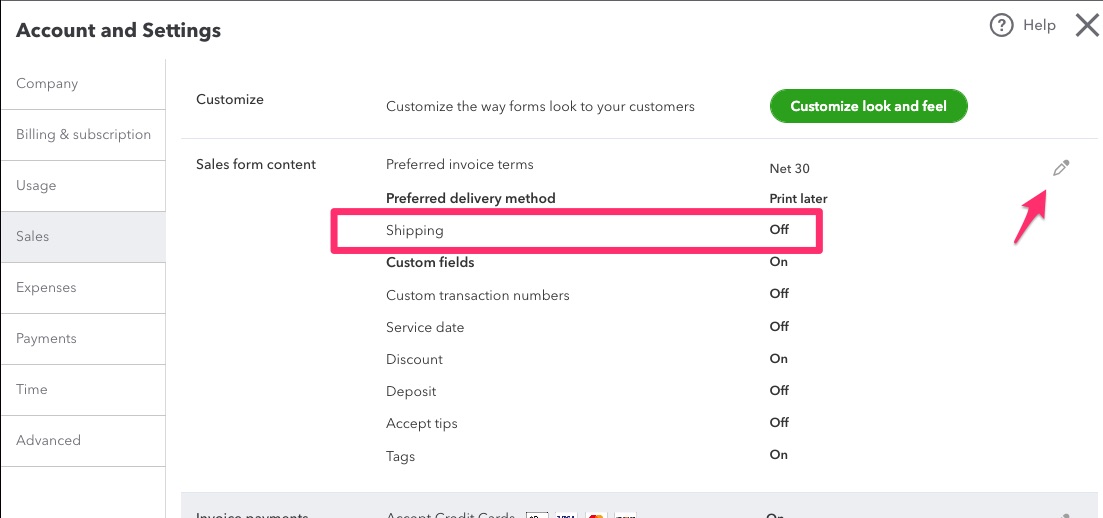
Click on the [Sales] Menu option to the left of the screen, and look for Shipping, which should be set to On. If your Shipping is set to Off, then click the pencil to the right of your screen to change this.
When you click the pencil, you will see the following screen, where Shipping has a toggle switch that is set to the left if your Shipping is turned off.
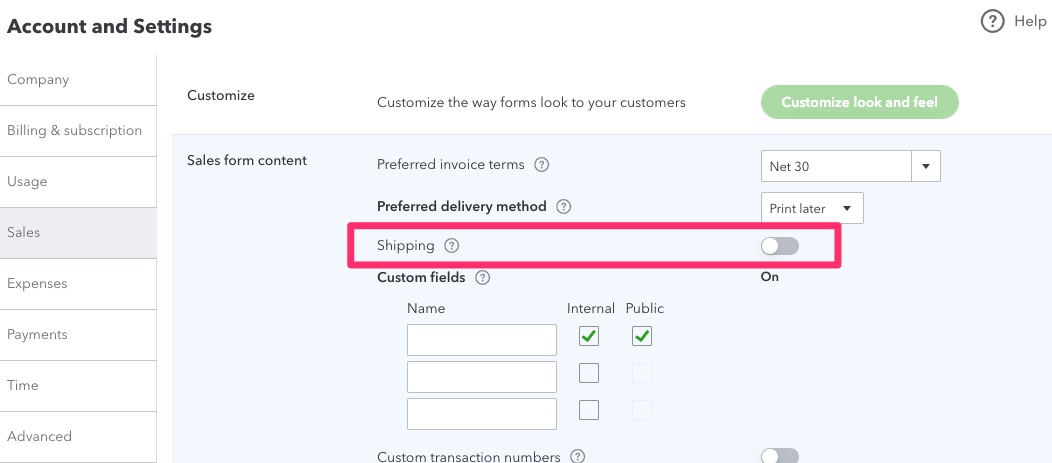
To turn Shipping on, simply click the toggle switch to slide it to the right.
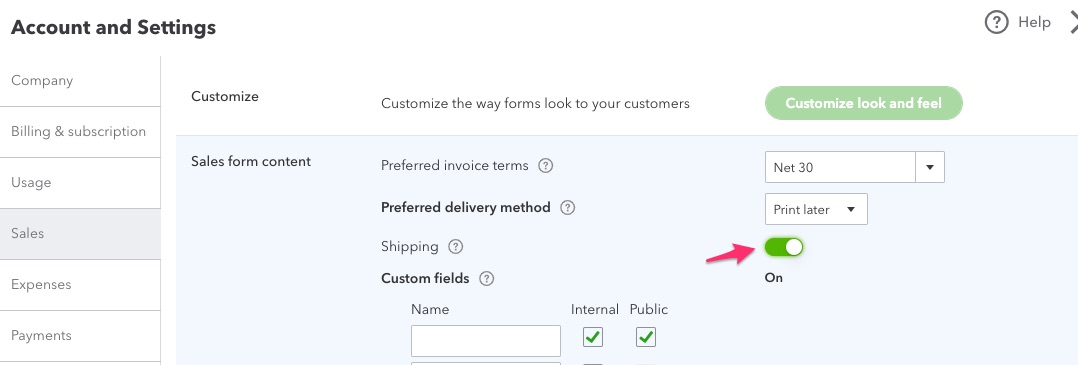
Click the green [Save] button immediately below the Sales form content section (highlighted in blue), and your screen will return to now show you your Shipping is turned On.

You have successfully enabled Shipping in your QuickBooks Online Company!