The following will help guide you through enabling sales tax in QuickBooks Online (QBO), which is required prior to connecting your QuickBooks Online Company to weintegrate. If you did not setup sales tax in QBO prior to connecting to we*integrate, you can disconnect your QBO Company, enable your sales tax, and reconnect your QBO Company (click Manage Your QuickBooks Online Connection to learn more).
Please make sure to consultant your tax advisor prior to proceeding
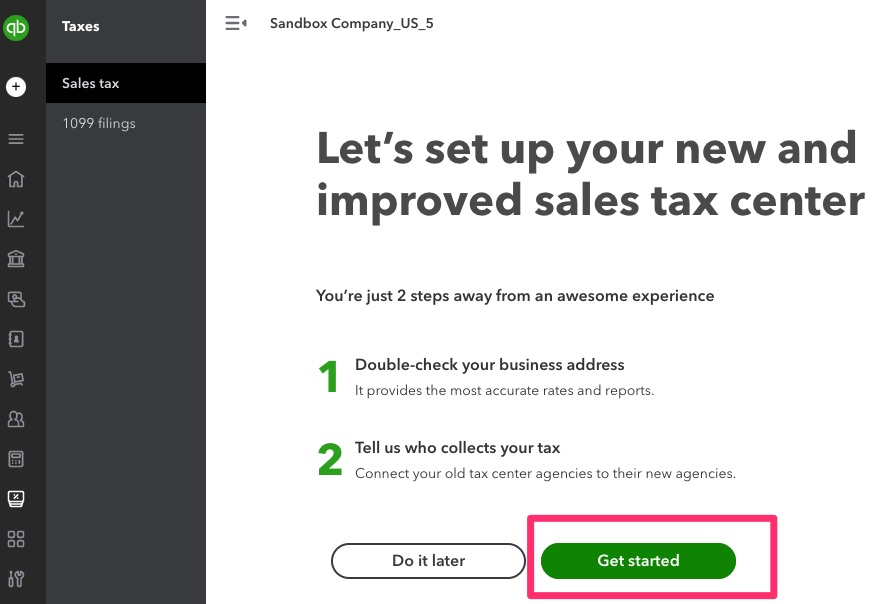
Enable your sales tax by clicking on the Taxes menu option on the left-side menu

If this is your first time into the Sales Tax Center of QBO, you will be guided through the initial setup once you click the green Get Started button
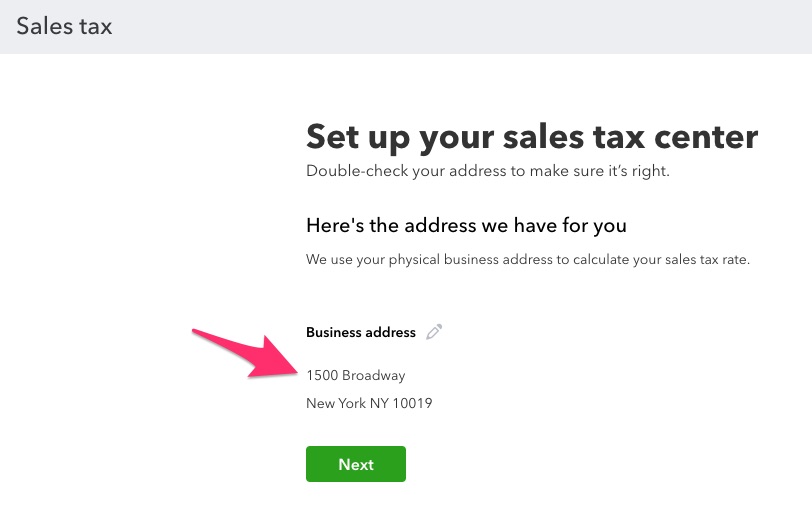
First, you will be asked to verify your business address. If any editing is required, click the pencil and make the adjustments. When ready, click the green Next button to continue.
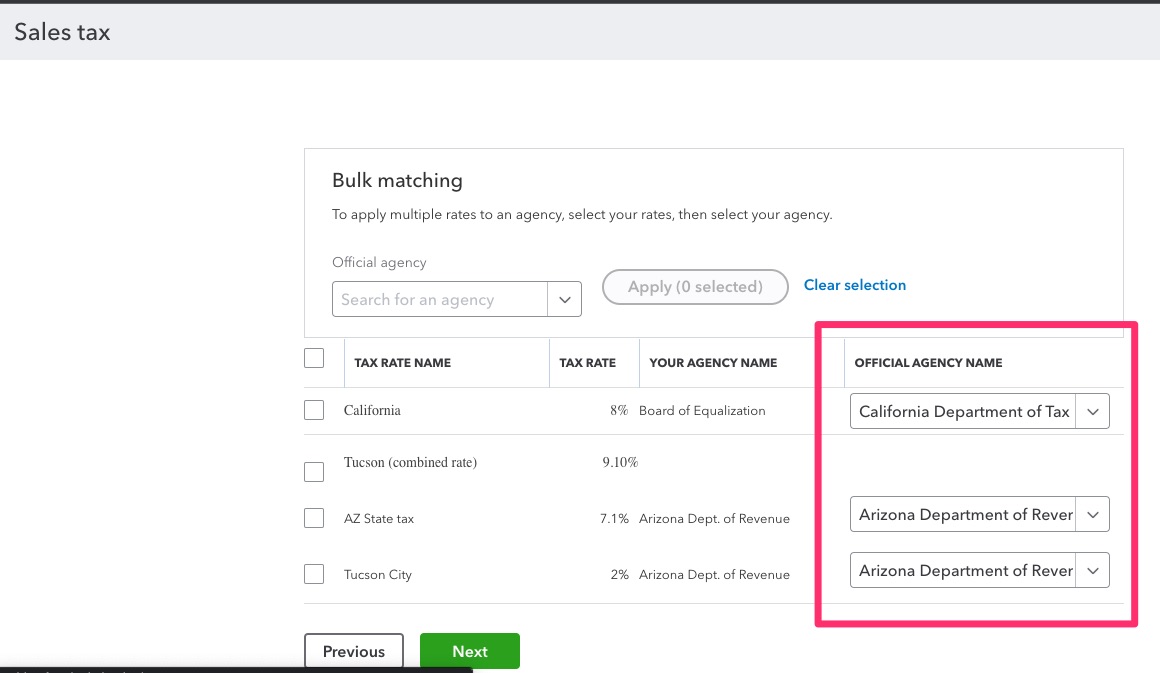
The next step is to assign agencies to any preset Tax Rates by selecting the appropriate Agency Name from the Official Agency Name dropdown list. (If this section is empty, skip this step)
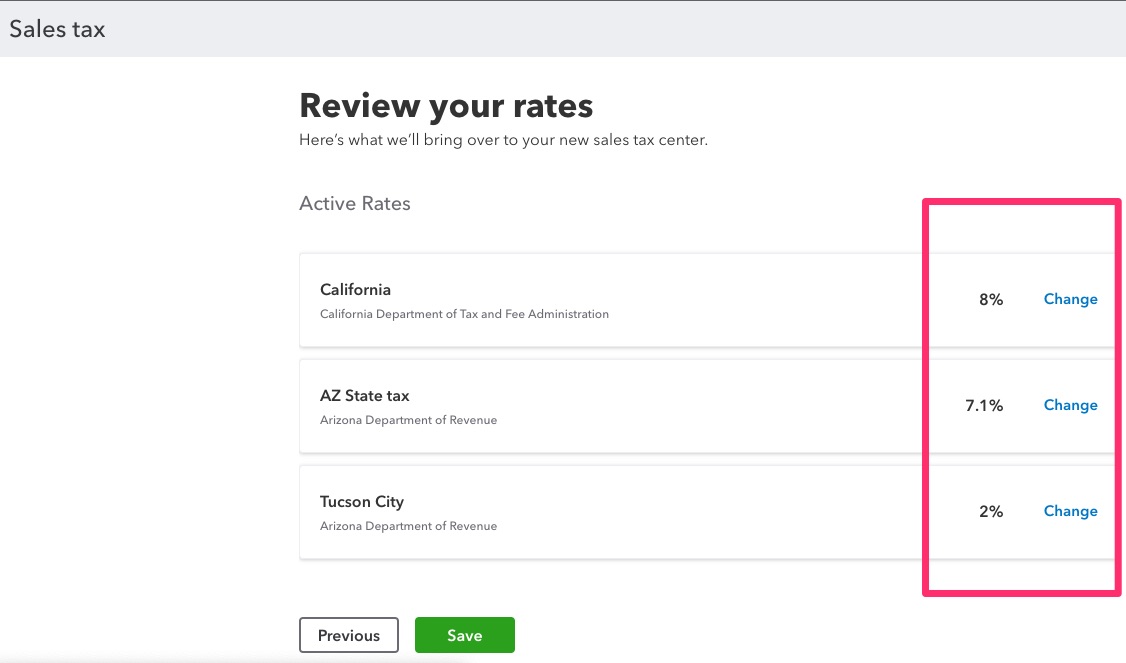
After assigning Tax Agencies and clicking the green Next button, you will be asked to review and confirm the rates for each agency. When you’re certain this is setup correctly, click the green Save button.
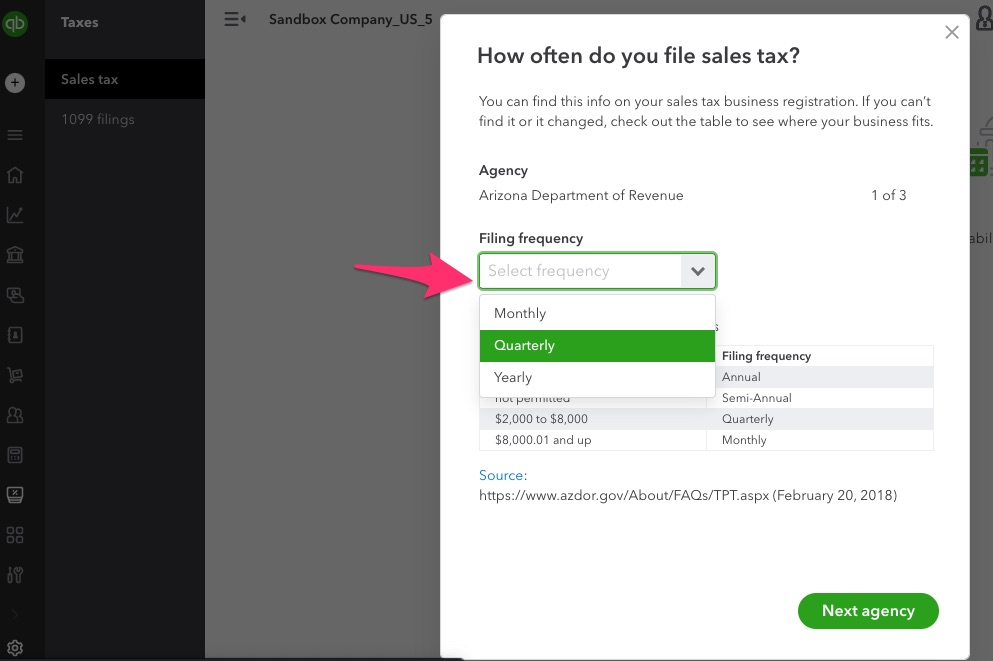
The final step of this setup requires you to select the Tax Filing Frequency for each Agency you have assigned. As with every other step of this process, you should discuss this with your tax advisor before continuing.
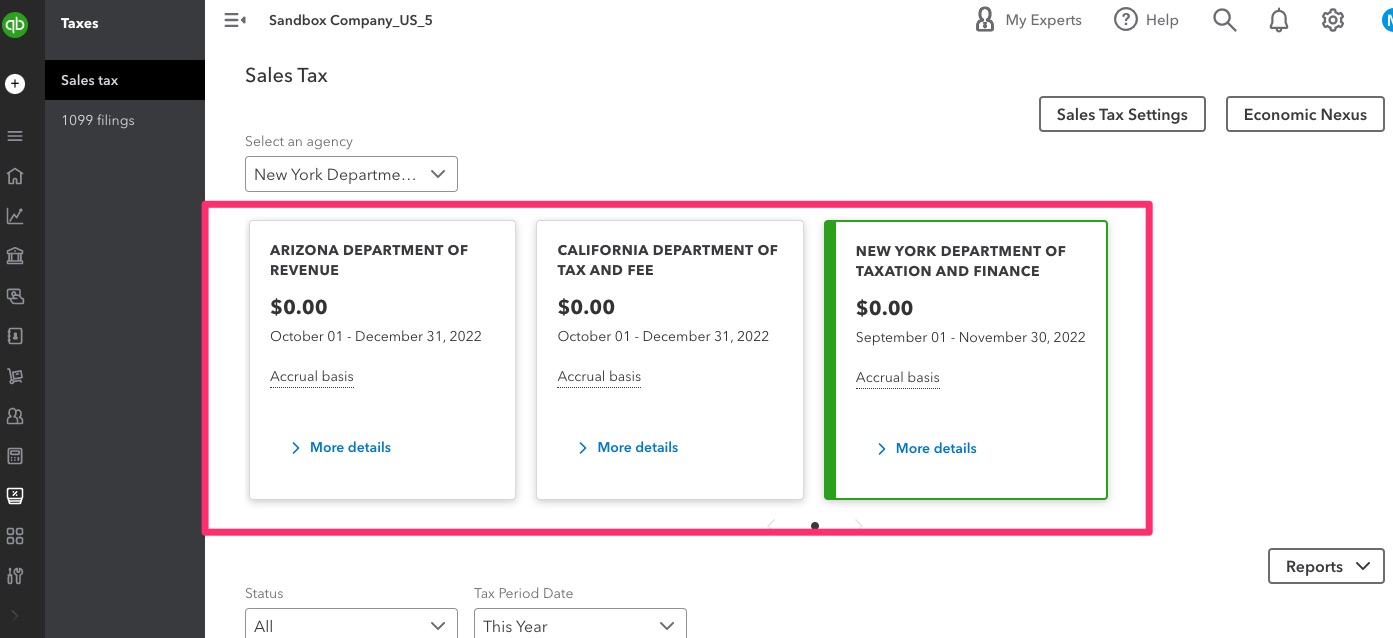
When finished, QBO will display the Sales Tax Center, listing the Tax Agencies you have created. If you need to add more Tax Agencies now or in the future, simply click the Sales Tax Settings button from this screen.